
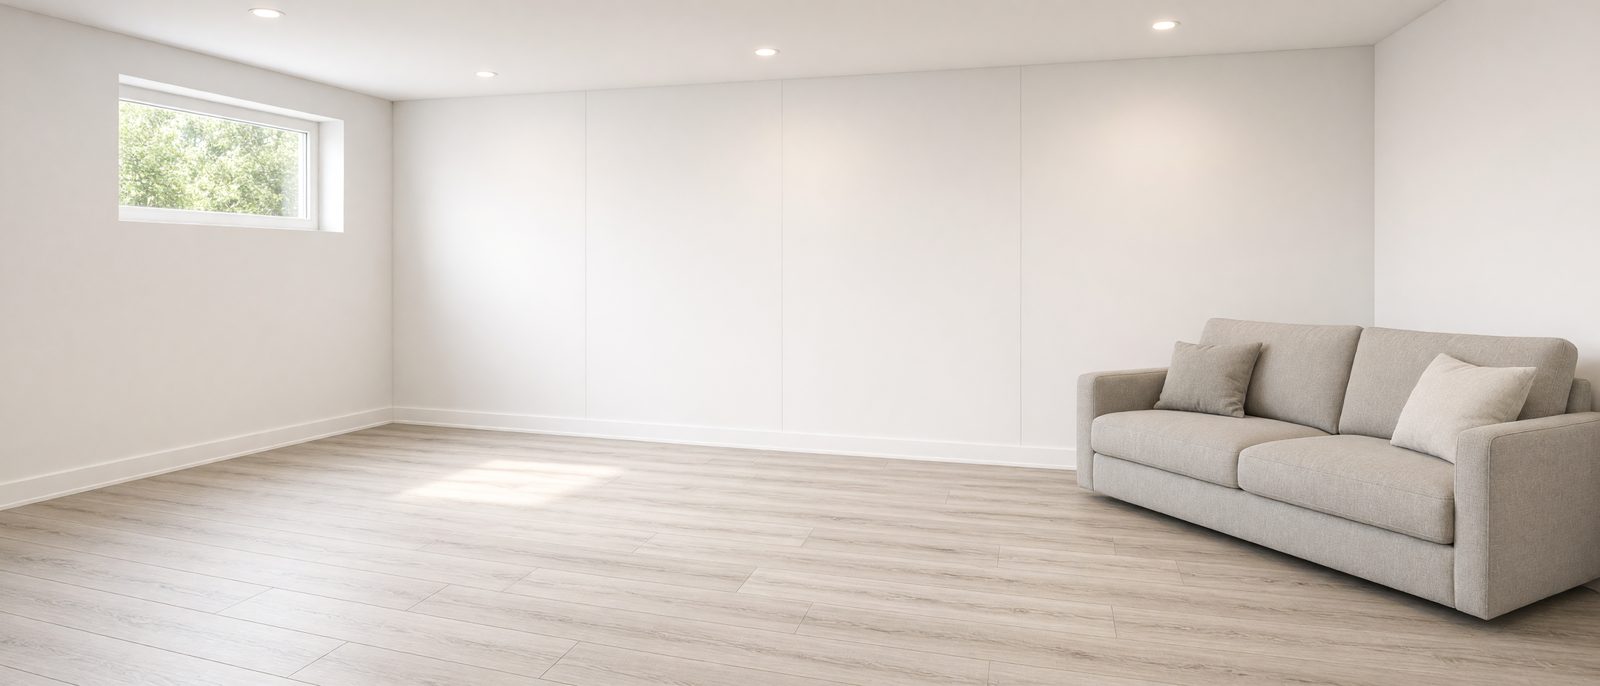
A basement wall should be built from the concrete inward: first a continuous rigid foam insulation fastened directly to the concrete, then steel framing in front of the foam, then a finish surface that water can’t hurt. The common wall of wood studs, fiberglass, plastic sheeting, and drywall traps moisture against cold concrete, which is where mold starts out of sight. Here’s the layer-by-layer version.
I get called into a lot of finished basements after the smell starts. Almost every time, someone built the wall the way you’d build one upstairs. It looked great for a few years. Behind the drywall, it was a different story. Here’s how I think a basement wall should go together, and why each layer is there.
Last reviewed: October 2026. Written by Stone Lawrence, owner of iFixBasements. I inspect and design basement wall and waterproofing repairs across New York, New Jersey, and northeastern Pennsylvania; licensed & insured certified dealer crews install them.
Key findings
- Mold needs moisture. The EPA says to keep indoor relative humidity below 60 percent, ideally between 30 and 50 percent [1].
- When warm, humid air touches a cold surface, condensation can form [2]. Air at 70°F and 50% relative humidity has a dew point just over 50°F [3].
- The soil beside a basement wall is, for all effective purposes, at 100% relative humidity throughout the year, and in field monitoring the moisture behavior of fiberglass-framed walls was dominated by airflow [4].
- Published guidance agrees on the layer order: non-water-sensitive insulation against the concrete, no fiberglass in contact with the foundation wall, and no interior vapor barrier [5][6][7].
- Foam plastic insulation must be covered by a thermal barrier, typically half-inch gypsum board or an equivalent approved material [8][9][10].
Scope and method
I reviewed published building-science guidance (Building Science Corporation), the U.S. Department of Energy’s Building America program and its Solution Center, EPA mold guidance, a Building America report from the Consortium for Advanced Residential Buildings, the National Weather Service’s dew point formula, and one county building department’s summary of the 2021 International Residential Code (IRC). Every number in this article comes from one of those sources and carries a bracketed reference number that matches the Sources list at the end. Where a source doesn’t give a number, I don’t supply one.
This article does not test any product, compare brands, or endorse one, and it is not a substitute for your local code. Codes and their amendments vary by town, and your building department has the final word.
Terms used in this article
- Relative humidity (RH): how much water vapor the air holds, compared with the most it can hold at that temperature.
- Dew point: the temperature at which air, cooled, can no longer hold its water vapor and begins to condense into liquid water.
- Vapor barrier / vapor retarder: a layer that blocks (barrier) or slows (retarder) the movement of water vapor. A perm is the unit used to rate how much vapor passes through a material.
- Air barrier: a continuous layer that stops room air from moving through or behind a wall.
- Rigid foam: insulation sold as stiff boards, such as expanded polystyrene (EPS), extruded polystyrene (XPS), or polyisocyanurate (polyiso).
- Thermal barrier: a covering, typically half-inch gypsum board or an equivalent approved material, that protects foam plastic insulation from fire.
- Non-water-sensitive insulation: insulation that isn’t harmed by getting wet, such as foam board, unlike fiberglass batts.
Why basement walls fail when they’re finished like upstairs walls
A concrete foundation wall isn’t a solid, dry barrier. Concrete is porous, so it wicks moisture from the ground around it. It also stays cool, because it’s in contact with the soil. When warm, humid indoor air reaches a cold surface, the moisture in that air can condense on it. That’s the same thing that happens on a cold glass of water in summer, and it’s tied to the dew point.
The numbers behind it
Moisture is the common thread, and the sources put numbers on it. The EPA recommends keeping indoor relative humidity below 60 percent, ideally between 30 and 50 percent [1][2]. In field monitoring of interior basement insulation systems, Building Science Corporation’s John Straube notes that “the soil adjacent to the basement walls is for all effective purposes at 100% relative humidity (saturation) throughout the year” [4]. A Department of Energy Building America profile adds that basements “can account for 10% to 30% of a home’s total heat loss and provide significant risk of moisture problems due to extensive cold surfaces at the walls and slab” [7].
Here is the dew point worked through once. Using the formula the National Weather Service publishes for its dew point calculator [3], air at 70°F and 50% relative humidity has a dew point just over 50°F, and at 60% relative humidity it is just over 55°F (my calculation, rounded). Any surface in contact with that air that is colder than those temperatures can collect liquid water. The EPA puts it in plain terms: “When warm, humid air contacts a cold surface, condensation may form” [2].
How long does it take to matter? The EPA says that if wet or damp materials are dried within 24 to 48 hours after a leak or spill, in most cases mold will not grow [1]. A Building America publication from the Consortium for Advanced Residential Buildings says mold “can develop within a day or two,” and that the optimum conditions for mold growth include surface relative humidities of around 80% [13]. The same publication lists what mold needs: oxygen, food, temperatures between 60 and 120°F, and water, and it calls water the most practical of those to control in homes [13]. Straube’s report treats surface relative humidity below 80% as safe [4].
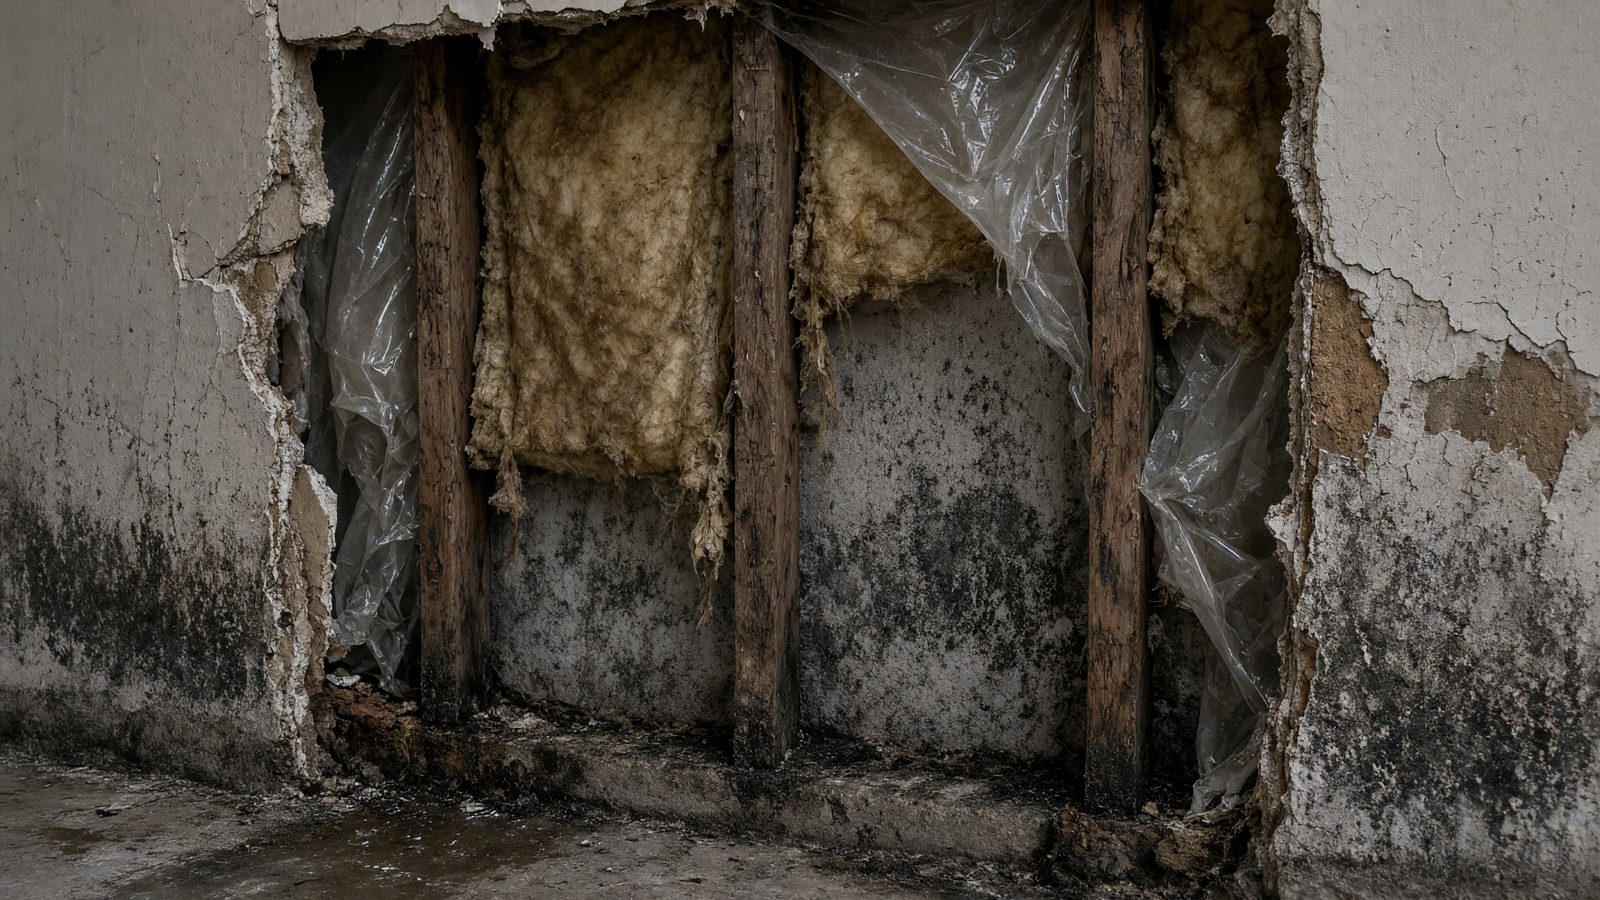
Now put wood studs, fiberglass batts, a plastic sheet, and paper-faced drywall against that wall. Every one of those materials either holds moisture or is something mold can eat, and they’re all sitting against the coldest, dampest surface in the house. The plastic gives the water nowhere to go: condensation forms behind it, runs down, and puddles at the base of the wall. You can’t see any of it, and that’s the problem.
Where the common wall fails: the moisture path, step by step
This is the sequence I see when I open up a failed wall. Each step is something the sources above describe.
- Water starts in the ground. The soil beside the wall sits at about 100% relative humidity all year [4], and concrete is porous, so moisture works its way toward the inside face.
- The concrete stays cool. It is in contact with that soil, so its inside face is colder than the room air.
- Room air reaches it. A stud wall with fiberglass batts has no continuous air barrier. In Straube’s monitoring, the moisture response of framed walls was “dominated by airflow” [4].
- The air drops below its dew point. At 70°F and 50% relative humidity the dew point is just over 50°F [3], so any part of the concrete colder than that collects liquid water [2].
- The water has nowhere to go. Plastic sheeting on the room side stops the wall from drying inward, which is why Building Science Corporation advises against interior vapor barriers [5][6]. The water runs down and puddles at the base of the wall.
- The materials stay wet. Paper-faced drywall, wood studs, and the dust in fiberglass can hold moisture or feed mold, and mold needs only food and water [13]. Left wet past 24 to 48 hours, mold can grow [1].
- Nobody sees it. The painted surface stays clean until the smell or the staining shows up.
Rule one: water first
No wall assembly fixes a wet basement. Outside, that means grading and gutters that move water away from the house. Inside, it can mean a perimeter drain and a sump system, and sealing cracks. A finished wall is not a waterproofing system, and I won’t build one over an active leak. If you’re not sure where your water is coming from, start with basement waterproofing and come back to the wall when the basement is dry.
Where a basement needs an interior drain, how it’s built matters. Mine sits on top of the footing, right at the wall, not down in the mud next to the footing, where the old pipe-in-stone drains silt up and clog and often have no way to clean them out. It catches water coming down the wall and up through the joint where the floor meets the wall, carries it to a sump, and has built-in inspection ports so it can be checked and cleaned out. That matters even more under a finished wall: you never want to tear up a finished room to fix a clogged drain.
What the building science says
None of this is just my opinion. Joseph Lstiburek of Building Science Corporation, who wrote “The Perfect Wall”, describes a wall as a set of control layers, in this order: water, air, vapor, then heat [11]. His advice is blunt: “if you can’t keep the air out don’t waste your time on the vapor” [11]. That order is the order of this article. Water first, then keep air off the concrete, then let the wall dry, then insulate.
On insulation, Building Science Corporation’s basement guidance says walls “should be insulated with non-water sensitive insulation that prevents interior air from contacting cold basement surfaces.” [5] (Basement Insulation, Info-511) The same sheet says that “no interior vapor barriers should be installed in order to permit inward drying” [5]. Lstiburek’s own foundation guide puts it this way: “The key to this assembly is the use of non-water sensitive rigid insulation on the interior that still permits drying to the interior.” [6] (Concrete Basement Foundations, BSI-125)
He is just as clear about plastic: “It is extremely important not to have a vapor barrier on the interior of internally insulated basement assemblies” [6]. A wall that can’t dry and can’t drain is a wall that holds water. That warning is about plastic sealed inside a finished wall with no way out. Plastic on the concrete is a different story when its bottom edge drains into a perimeter drain: any condensation that forms behind it runs into the drain instead of puddling at the base of the wall.
Watch: a vapor barrier that drains into the perimeter drain, on Instagram
The U.S. Department of Energy’s Building America program says the foam panels “must adhere completely to the foundation wall, with no air gaps behind them,” and that “Fiberglass batt or cellulose insulation should not be in contact with foundation walls.” [7] (Basement Insulation Systems) The Department of Energy’s Building America Solution Center lists the same checkpoints for an insulated basement: insulation that is non-fibrous and “installed directly in contact with the basement wall” with “no channel for air movement between the insulation and the concrete,” and “no moisture-sensitive materials” in contact with the concrete walls or floor [8]. And as Lstiburek puts it: “Mold is a water problem. No water, no mold.” [12] That’s why the first rule is water first.
The layers, from the concrete in
- Concrete foundation wall. Water handled first: grading, gutters and cracks.
- Rigid foam board fastened to the concrete. Gray foam with a reflective aluminum face, seams taped. Keeps a warm surface, stops air, slows vapor, and gives mold nothing to eat.
- Steel stud frame in front of the foam. Won’t rot or feed mold. Wiring and pipes run inside it.
- Inorganic finished wall panel. Washable. No wood, no drywall, no fiberglass.
- Moisture-proof base trim. Kept off the slab so a little water can’t wick up the wall.
- Interior perimeter drain on top of the footing. A narrow trench is cut along the wall, the channel sits on the footing, out of the mud where buried drains clog, and new concrete goes back over it. A small flange at the wall-floor joint lets water coming down the wall drop in, and the channel carries it to a sump. Built-in inspection ports let it be checked and cleaned out.
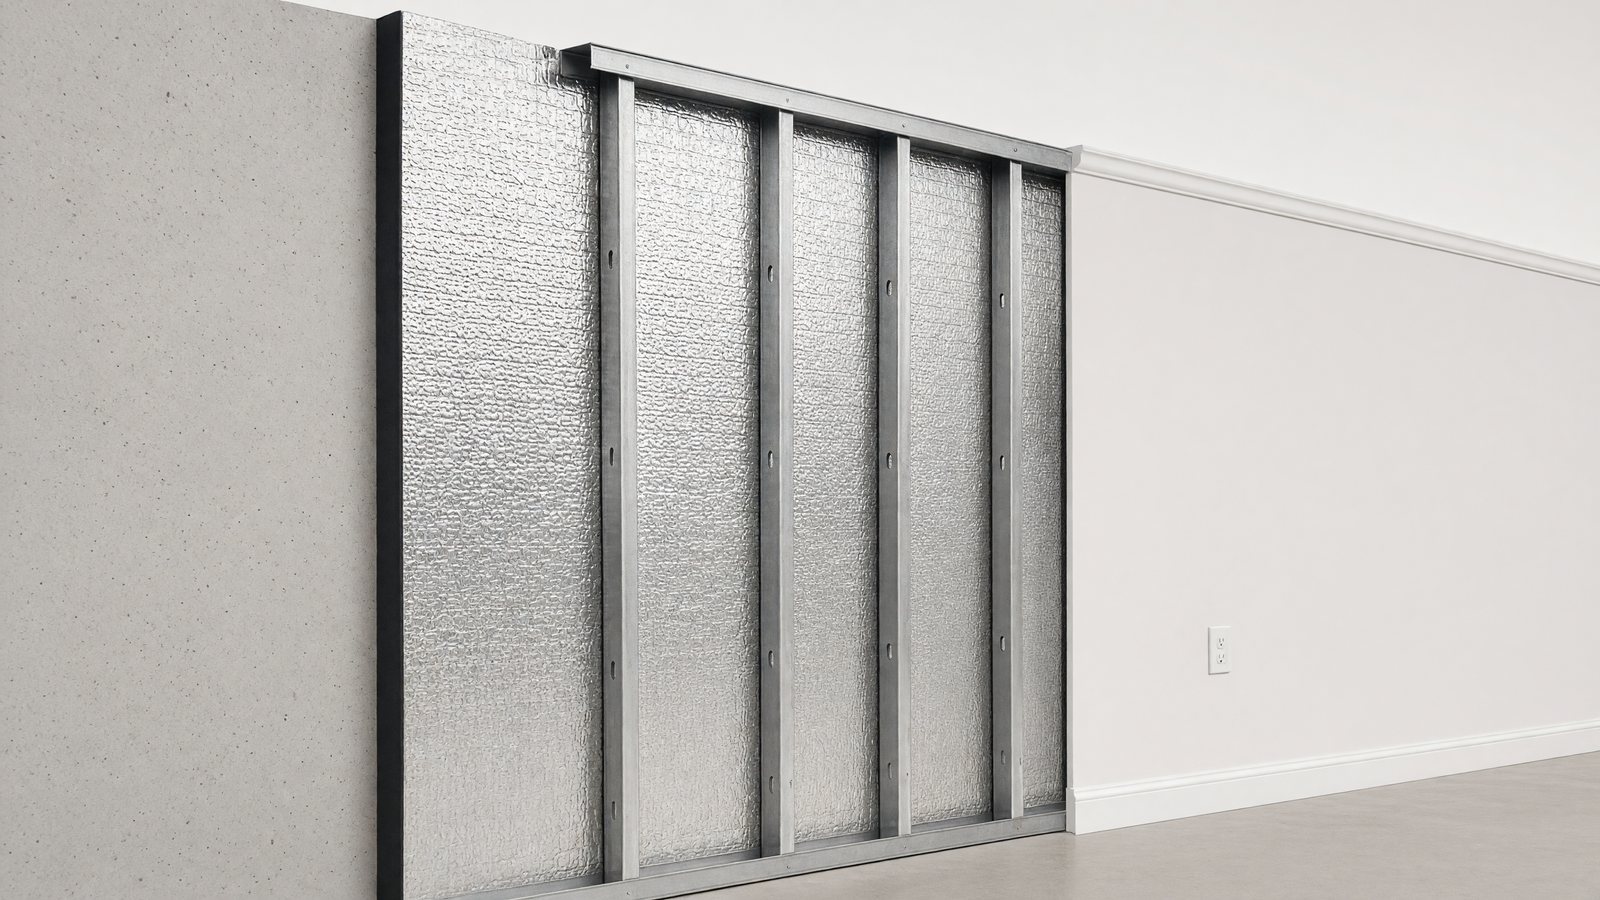
- Foundation wall, with drainage handled
- Drainage membrane where there’s seepage risk
- Continuous rigid foam insulation
- Steel stud framing inside the foam
- Finish surface made of inorganic material
a) The foundation wall
It starts with a dry wall and drainage that’s already handled. Where there’s a risk of seepage, a dimpled drainage membrane goes against the wall. It gives any water that does get through a path to run down to the perimeter drain instead of soaking into the finish.
b) Continuous rigid foam insulation
Rigid foam board is fastened directly to the concrete, with the seams taped or sealed. This is the layer that does the most work. It keeps the surface your indoor air actually touches warm, which keeps it above the dew point. Foam doesn’t absorb water, and it gives mold nothing to eat. It does three jobs at once: it’s a thermal break, it keeps air from reaching the concrete, and it acts as a vapor retarder, which slows vapor down without shutting the wall off, so the wall can still dry slowly toward the inside. For scale, published figures for generic rigid foam board are about R-3.6 to R-4.2 per inch for EPS, R-5 per inch for XPS, and R-5.7 to R-6 per inch for polyiso [15]. Those are generic material values, not a rating of any particular product or of my wall. Foil-faced foam is also used, and it blocks vapor almost completely. Building scientists say that can work, but it needs extra moisture management, which is one more reason the water has to be handled with drainage first.
c) Framing kept inside the foam
The wall is framed in front of the foam, not against the concrete. I prefer light-gauge steel studs, because they don’t rot, warp, or feed mold. Wires and pipes run in the stud cavity, so the insulation layer stays unbroken. If wood is used anywhere at the floor, it should be pressure-treated and kept off the slab with a capillary break.
d) A finish surface that water can’t hurt
The finish layer should be an inorganic material, such as PVC or vinyl panels, or a cement-based panel. They wash clean and aren’t harmed by water. One thing to know: building codes generally require foam plastic insulation to be covered by an approved thermal barrier, so whatever finish you choose has to be one that’s rated for that. The Department of Energy says foam board used on interior walls “must be covered with 1/2-inch gypsum board or other building-code approved material for fire safety” [9], and the Building America Solution Center notes that most codes require a thermal barrier (typically half-inch gypsum board or equivalent) or an ignition barrier (typically three-eighths-inch gypsum board or equivalent) over foam insulation [10]. The Solution Center also states that the International Residential Code requires foam insulation to be covered with a thermal barrier for fire resistance [8]. Building Science Corporation adds that half-inch gypsum board usually provides the ignition barrier [5]. Whatever finish you choose still has to be one that’s rated to cover foam under your local code. Check with your installer and your local building department.
e) The bottom of the wall
Keep finish materials off the slab, and use moisture-proof base trim. If there’s ever a small water event, nothing should be sitting in it, wicking it up the wall.
Comparison of wall assemblies
A side-by-side summary of the three assemblies discussed above. The ratings are my qualitative reading of sources [4][5][6][7][8], not measurements.
| Criterion | Common wall (wood studs, fiberglass, drywall) | Common wall plus plastic sheeting | Foam-first wall (foam, steel studs, inorganic panels) |
|---|---|---|---|
| Air contact with the concrete | Room air can move through and behind the batts [4][8] | Same, and the plastic can hide it | Foam adhered to the concrete with no air gaps behind it [7] |
| Insulation water sensitivity | High: fiberglass is a water-sensitive insulation [5] | High: same fiberglass behind the plastic | Low: foam is non-water-sensitive insulation [5][6] |
| Vapor control | None designed in | A vapor barrier on the interior of the assembly, which BSC advises against [6] | A vapor retarder that slows vapor while the wall can still dry inward [6] |
| Drying path | Slow, and dominated by airflow [4] | Blocked toward the room; water runs down and puddles | Slow drying toward the inside; water handled first with drainage |
| Mold food | Paper facing, wood framing, and dust in fiberglass [13] | Same, kept damp behind the plastic | No wood, paper, or fiberglass in the wall |
| Inspection access | Hidden behind drywall; found only when it smells or stains | Hidden, and the plastic masks leaks | Nothing organic to rot; the base of the wall wipes clean and stays visible |
What not to do
- Don’t put plastic sheeting against a foundation wall unless its bottom edge drains into a perimeter drain. With nowhere to go, the condensation behind it puddles at the base of the wall.
- Don’t put fiberglass batts against concrete.
- Don’t let paper-faced drywall touch the slab.
- Don’t finish over active leaks, or over efflorescence (the white mineral deposits on masonry), without finding out what’s causing them.
Will it pass inspection?
Finished basements usually need permits, and the rules vary by town. Ask your building department what applies before you start. If the finished space includes a bedroom, there are also requirements for a way out in a fire, and a window or door that serves as one has to stay openable. For reference, Boulder County, Colorado’s building department summarizes the 2021 IRC section R310 requirements for basement escape openings as a net clear opening of at least 5.7 square feet, at least 24 inches of clear height and 20 inches of clear width, and a sill no higher than 44 inches above the floor [14]. Local editions and amendments differ, so treat that as a reference point, not your town’s rule. I never recommend a fixed panel over a window that someone might need to escape through. I’ll point out which windows are which at the estimate, and your town has the final word.
Checklist for any basement finishing quote
- Does it start with where the water is coming from?
- Is the insulation continuous rigid foam against the concrete, with sealed seams?
- Is the framing steel, or pressure-treated wood kept off the slab?
- Is the finish surface inorganic and rated to cover the foam?
- Is there any fiberglass against the foundation wall, and if there’s plastic, does it drain into a perimeter drain?
- Is the base of the wall kept off the slab with moisture-proof trim?
- Who is handling permits, and what does your town require?
The wall system I install
This is the wall I install. It’s built in exactly the order above: foil-faced foam board fastened to the concrete, a steel stud frame in front of it, and inorganic finished panels. There’s no wood, drywall, or fiberglass anywhere in it. It’s all metal, cement board, vinyl, PVC, and foam. You can see the details on the basement wall system page.
The foam in my system is foil-faced. As the sources above say, foil-faced foam can work, but it needs extra moisture management. That’s exactly why I only install this wall over a basement where the water is already handled, with perimeter drainage and a sump system where needed. If you’re not sure yours is, start with basement waterproofing.
Beyond the walls, I also offer entrance doors and stairs and waterproof plank flooring. The wall system is Phase 2 of my three-phase approach to finishing a basement, and you can see all three phases on my basement finishing page.
I personally inspect and design the fix, then a licensed & insured certified dealer crew installs it. The estimate is free, and no-money-down financing is available.
Straight Answers
Frequently asked questions
Can I finish my basement with wood studs and fiberglass insulation?
It’s done all the time, but it’s the setup most likely to cause trouble. Wood and fiberglass can hold moisture, and they sit right against cold, damp concrete. A wall built with foam against the concrete and steel framing in front of it avoids both problems.
Do I need a plastic vapor barrier on a basement wall?
Not by itself. Building scientists advise against a vapor barrier sealed inside an insulated basement wall, because the wall needs to be able to dry. Plastic against the concrete only works when its bottom edge drains into a perimeter drain, so the condensation that forms behind it has somewhere to go; without drainage it puddles at the base of the wall. Foam against the concrete keeps warm indoor air off the cold surface and works as a vapor retarder, not a vapor barrier. Requirements vary, so confirm what your local code calls for.
Do I need a permit to finish a basement?
Usually, yes. Finished basements generally need permits, but the rules vary from town to town. Ask your local building department before work starts, and make sure whoever does the work knows what your town requires.
Why steel studs instead of wood?
Light-gauge steel studs don’t rot, warp, or feed mold, and they stay straight. Where wood is used at the floor, it should be pressure-treated and kept off the slab with a capillary break.
Can I finish a basement that has had water in it?
Only after the water has been diagnosed and dealt with. Finishing over an active leak, or over white mineral deposits on the wall, hides the problem and sets up the next one. That’s why the first step is always a look at where the water is coming from.
Sources
- U.S. Environmental Protection Agency, “A Brief Guide to Mold, Moisture and Your Home”. https://www.epa.gov/mold/brief-guide-mold-moisture-and-your-home
- U.S. Environmental Protection Agency, “Mold Course Chapter 2: Why and Where Mold Grows”. https://www.epa.gov/mold/mold-course-chapter-2
- National Weather Service, El Paso, TX Weather Forecast Office, NOAA, “Dewpoint and Wet-bulb from Relative Humidity (calculator and formula)”. https://www.weather.gov/epz/wxcalc_rh
- John Straube, Building Science Corporation, “RR-0906: Field Monitoring and Hygrothermal Modeling of Interior Basement Insulation Systems” (2009). https://buildingscience.com/documents/reports/rr-0906-field-monitoring-hygrothermal-modeling-basement-insulation/view
- Building Science Corporation, “Basement Insulation, Info-511” (2009). https://www.buildingscience.com/documents/information-sheets/basement-insulation
- Joseph Lstiburek, Building Science Corporation, “Concrete Basement Foundations, BSI-125” (2021). https://buildingscience.com/sites/default/files/document/bsi-125_concrete_basement_foundations_c.pdf
- U.S. Department of Energy, Building America, “Basement Insulation Systems, Building America Top Innovations Hall of Fame Profile” (2013). https://www.energy.gov/eere/buildings/downloads/building-america-top-innovations-hall-fame-profile-basement-insulation
- Building America Solution Center, Pacific Northwest National Laboratory, “Air Sealed, Insulated Basements”. https://basc.pnnl.gov/resource-guides/air-sealed-insulated-basements
- U.S. Department of Energy, Energy Saver, “Types of Insulation: Foam Board or Rigid Foam”. https://www.energy.gov/energysaver/types-insulation
- Building America Solution Center, Pacific Northwest National Laboratory, “Rigid Foam Board Interior Insulation for Existing Foundation Walls”. https://basc.pnnl.gov/resource-guides/rigid-foam-board-interior-insulation-existing-foundation-walls
- Joseph Lstiburek, Building Science Corporation, “The Perfect Wall, BSI-001” (2010). https://www.buildingscience.com/documents/insights/bsi-001-the-perfect-wall
- Joseph Lstiburek, Building Science Corporation, “Five Things, BSI-039” (2010). https://buildingscience.com/documents/insights/bsi-039-five-things
- Consortium for Advanced Residential Buildings (Steven Winter Associates), for the U.S. Department of Energy Building America program, “Improving the Built Environment: Mold: Ignorance Is Not Bliss” (2010). https://www1.eere.energy.gov/buildings/publications/pdfs/building_america/mold_writeup.pdf
- Boulder County, Colorado, “Escape and Rescue Openings, B10 (summary of 2021 IRC section R310)”. https://bouldercounty.gov/property-and-land/land-use/building/building-publications/b10-emergency-escape-and-rescue-openings/
- Martin Holladay, GreenBuildingAdvisor, “Choosing Rigid Foam” (2016, updated 2018). https://www.greenbuildingadvisor.com/article/choosing-rigid-foam
These are independent sources; they don’t endorse any company or product.